Themes
Anatomy
Simple Machines
Design Engineering
Robotics
Evolution
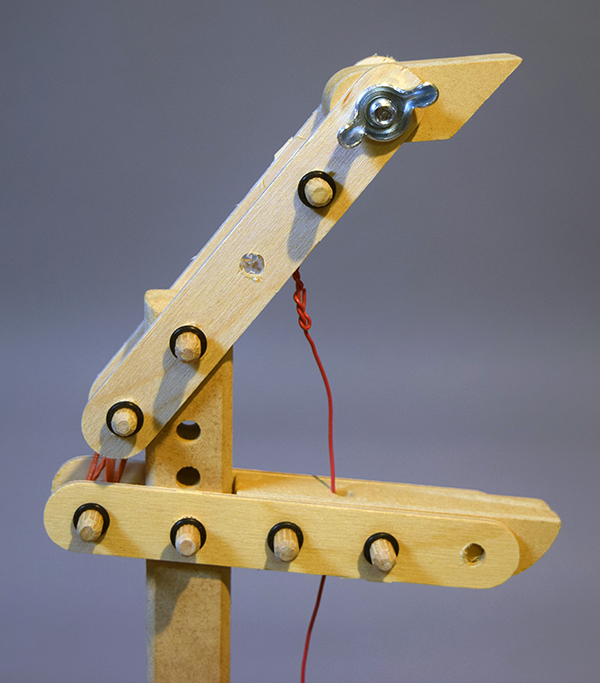
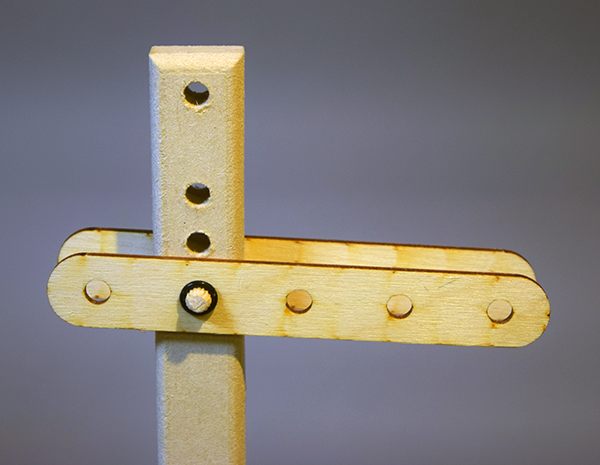
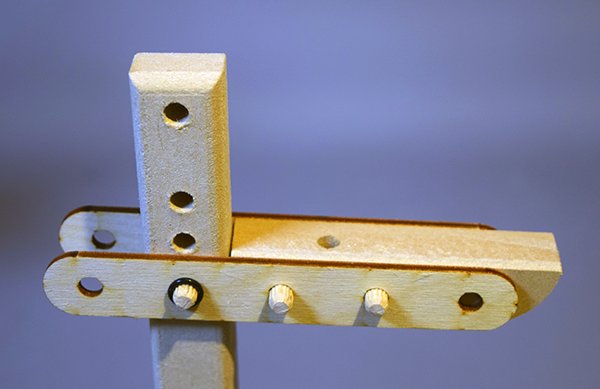
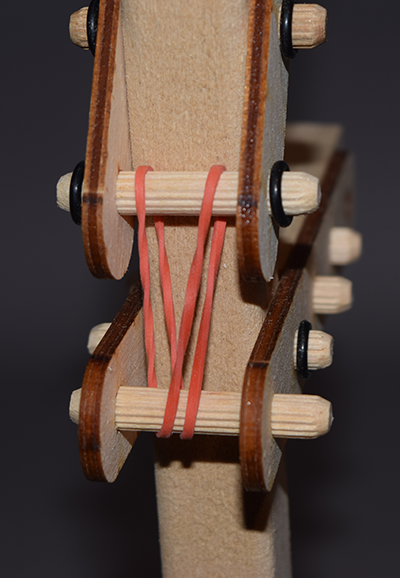
With modular wooden pieces, wire and rubber bands, construct a hand with fingers. The parts will work in a dozen basic configurations.
Test your design
Retrieve a lifesaver, a penny, a marble from a cup. Pick up a marker and draw. Pop a balloon. Propose your own challenge. Invent games two hands can play.
Outcomes
Each task may require specific adjustments. Some hand configurations are more versatile than others. Discover the interplay between tasks and design.
We are accustomed to teaching with a model in front of a child, but these instructions should make it so that anyone can build one without our presence. We urge that parents and teachers be there to guide – but to allow the child to try to let the materials (and a picture of the final product) guide them. A wrong direction is always un-doable until you've glued something.
<br>The Parts.
<br><img src="https://www.eliwhitney.org/sites/default/files/Inventive Arm parts.png" />
<br>This will give you an Inventive Arm which has a fixed bottom (jaw/finger) and a moveable upper finger with a hinged digit at the end. Look at the picture. Two versions: either <em>Always Open</em> or <em>Always Closed</em>
<br><img src="https://www.eliwhitney.org/sites/default/files/Alw open or Alw closed.png" />
<br><strong>Step 1</strong>. Place the long stick with holes into the base. Make sure it is not upside down. Look at the picture. <br><img src="https://www.eliwhitney.org/sites/default/files/step 1.png" />
<br><strong>Step 2 and Step 3</strong> Attach the linkage pieces as shown and then insert the 3/4" thick piece with the hole in it between the linkage pieces as shown. Push the dowels through the holes to hold these pieces on. If needed add the O rings to keep them in place if they get loose.
<br><img src="https://www.eliwhitney.org/sites/default/files/Step 3_3.png" />
<br><strong>Step 4</strong> Put the other two linkage pieces at the top of the stick and attach with a dowel as shown (use o ring if needed). Add another dowel through the holes behind the stick as well (the rubberband will hook onto this one soon).
<br><img src="https://www.eliwhitney.org/sites/default/files/Step 4_3.png" />
<br><strong>Step 5</strong> Attach the short fingertip piece as shown using the bolt instead of a dowel. The Wing Nut is screwed on the other side of the bolt to hold it on and adjust the tightness. (see images below)
<br><img src="https://www.eliwhitney.org/sites/default/files/Step 5.png" />
<br><img src="https://www.eliwhitney.org/sites/default/files/Step 5a.png" />
<br><strong>Step 6 -7</strong> Place the rubber band as shown behind the top dowel at the end of the upper assembly. Then fold the top loop over the down and put your finger through both loops. Slide another dowel through both loops to attach them to the end of the lower bar.
The photos should explain how it will look when the top and bottom parts are attached. If you have another way to to it that's ok too.
<br><img src="https://www.eliwhitney.org/sites/default/files/Step 6_1.png" />
<br><img src="https://www.eliwhitney.org/sites/default/files/step 7.png" />
<br><img src="https://www.eliwhitney.org/sites/default/files/Step 7a detail.png" />
<br><strong>Step 8-10</strong> The last steps show how to attach the wire with the loop to another dowel you put into the upper moveable arm.
<br><img src="https://www.eliwhitney.org/sites/default/files/Step 8.png" />
<br><img src="https://www.eliwhitney.org/sites/default/files/Step 9.png" />
<br><img src="https://www.eliwhitney.org/sites/default/files/Step 10.png" />
Now try to pick up different materials with your robot hand. You may have to adjust the 'fingertip' to grab different things. Experiment!